
Open Forest has three Slotbound bosses: Grimwolf Orc summons wolves, Howl Orc gains attack speed with each roar, and Orc Arch Shaman has a dangerous phase at half health. Their skills call for different preparations. Below are the listed mechanics and suggested responses to test with your army.
Judgement waves and boss waves are distinct checkpoints. The current Open Forest reference marks judgement waves at 5, 15 and 25, and bosses at 10, 20 and 30 where the chosen difficulty reaches them. Use the wave label in your game to confirm the next checkpoint.
Open Forest checkpoint reference
| Wave | Type | Named opponent or checkpoint |
|---|---|---|
| 5 | Judgement | First marked judgement wave |
| 10 | Boss | Grimwolf Orc |
| 15 | Judgement | Second marked judgement wave |
| 20 | Boss | Howl Orc |
| 25 | Judgement | Third marked judgement wave |
| 30 | Boss | Orc Arch Shaman |
Easy ends earlier than Normal, and Hard extends the stage to thirty waves in the cited reference. This is an Open Forest map of checkpoints, not a universal boss-name list for every stage. Wasteland and later stages have their own enemies and bosses.
The spelling “Judgment” appears in the game reference and developer notes; players also search for “judgement wave.” Both spellings on this page refer to the same checkpoint label, not two separate mechanics.
Judgement waves in Open Forest
The stage reference labels waves 5, 15 and 25 as Judgment checkpoints. You will only reach the later ones in a difficulty that runs that far. These are separate from the named bosses at 10, 20 and 30; a boss list alone does not tell you when to prepare for them.
Before entering, finish the current promotion choice, check capacity and confirm that essential support units survived your last absorption. Use the actual wave preview to identify the next enemies. The source establishes these checkpoint positions, but does not establish a single universal enemy formation or guaranteed counter for every judgement wave, so this guide does not invent one. If you are recording a failed attempt, keep the stage, difficulty and wave number together; “wave 15” without the stage is an incomplete comparison.
Grimwolf Orc: keep up with the wolves
Listed mechanic: Grimwolf summons two wolves every three seconds. Those summoned wolves cannot damage your base. It appears at wave 10 on Easy, Normal and Hard. Grimwolf Orc reference.
Counter to test: keep damage on the boss while using enough area damage to stop the wolves overwhelming your army. Clearing each pair without hurting Grimwolf leaves you facing repeated summons. If your units collapse before the next pair arrives, improve frontline survival; if they hold but the boss stays healthy, improve sustained damage. The base-damage restriction applies to these summoned wolves. Other enemies in the wave may still threaten the base.
Howl Orc: repeated roars make a long fight harder
Listed mechanic: Howl Orc’s roar hits up to three nearby allies for 200% ATK damage and pushes them back. Each roar also raises its attack speed. It appears at wave 20 on Normal and Hard. Howl Orc reference.
Counter to test: keep a durable unit taking the close-range pressure while ranged damage continues working. Watch what fails after a roar: deaths point to insufficient survival, while repeated displacement with little boss damage suggests poor damage uptime. Durability alone can prolong the fight and permit more attack-speed increases. The source gives no roar radius, cooldown or size for each speed increase, so it does not establish an exact safe position.
Orc Arch Shaman: survive the half-health surge
Listed mechanic: Its bolts add nearby damage equal to 50% ATK; a falling spell deals 140% ATK to a nearby ally. Once its health reaches 50% or less, it enters a five-second phase with stronger bolts and more frequent spells, then briefly takes increased damage. This is the wave 30 boss on Hard. Orc Arch Shaman reference.
Counter to test: build enough survival to keep your damage dealers alive through that surge so they can exploit the vulnerable period afterward. If an attempt collapses around half health, address that burst window before investing only in more damage. The source does not give the vulnerability’s duration or multiplier.
These skill descriptions come from community reference pages checked on 17 November 2026. The counters are our tactical interpretations, not tested clears. If your current Collection shows different skill text, use the in-game version.
Check what the army loses at a boss
Extra-target effects can clear wolves or other accompanying enemies, but that part of their damage stops contributing when only the boss remains. Likewise, a defeat-triggered bonus needs something to die before it activates. Read the actual imprints on your carry and check which triggers the upcoming encounter can supply.
Before the wave, confirm that absorption has not consumed an essential support or replaced the imprint your plan needs. Use the Collection during promotion to compare branches; mid-run access was added in v1.0.0 (8). A last-minute promotion helps only if the army can still perform its existing jobs afterward.
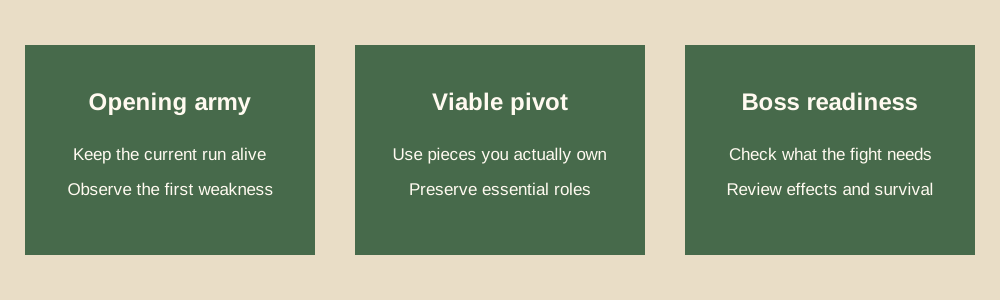
Use the failed attempt to choose an upgrade
Watch for the first loss that changes the fight. A carry dying before it attacks calls for protection. A surviving army that barely reduces the boss’s health needs more damage or more reliable triggers. For Orc Arch Shaman, note whether the collapse happens during its half-health surge; for Grimwolf, check whether summons are tying up the army.
Spend on that problem. A reachable promotion or an effect that fills the missing role is easier to evaluate than a purchase that depends on several future rolls. Keep the working parts of the army while changing one weakness. Record the stage, difficulty, wave and game version if you compare attempts: the same boss name can appear in discussions from before a balance change.
Recent changes that affect boss advice
The developer made the first boss of each stage easier in v1.0.0 (6). Earlier launch updates also adjusted the first stages. If a guide or complaint predates those changes, its account of difficulty may not match the version you are playing.
The v1.0.0 (7) notes also fixed the Stage 6 rift retaining its normal colour during Judgment Waves. That is a presentation fix, not evidence that the underlying checkpoint was removed. A colour cue should help you read the wave, but the wave information itself remains the safer reference.
Deadeye received an attack reduction in the same patch. If you are copying a demonstration built around its older damage, compare the publication date and current unit information. The patch notes do not provide enough detail to calculate a replacement damage formula here.
Use a full run as a reference
The Wasteland Hard video below includes a boss chapter at 36:57. Watch how the army was assembled before jumping directly to the final fight. The creator’s description identifies a Forest opening followed by Cannoneer and Gladiator; the build notebook lays out the chapter sequence.
It is not an Open Forest counter guide. Its value here is showing the relationship between preparation and a final fight in one actual player run. Do not transfer boss-specific conclusions between stages simply because both runs are on Hard.
Sources and scope
Open Forest’s named checkpoints come from Wikily’s stage reference, checked 17 November 2026. The first-boss adjustment is in v1.0.0 (6), and the rift display fix is in v1.0.0 (7). The three linked enemy pages supply the skill descriptions. Wikily is a community source and does not identify an exact game build on those individual pages. Suggested counters are editorial analysis; no independent boss clear or universal counter is claimed.
The final boss chapter starts at 36:57. This is Wasteland footage, not an Open Forest boss demonstration.
Original video on YouTubeLook up a unit · Plan a build · Check the latest covered patch
Evidence-based editorial guidance. We have not independently play-tested these builds. How we check and update this guide.