
Slotbound imprints are effects a unit gains through absorption. Before consuming a donor, check both the effect it provides and the receiver’s available slots. Improving the wrong effect, or replacing the one that keeps your build working, can be more costly than the visible level gain suggests.
Ask which effect this receiver can use in the next fight. Start with the five Normal-unit donors below, then use the in-game Collection for the exact class and current values on your board.
A starter donor map
| Donor | Imprint | What to look for |
|---|---|---|
| Warrior | Buildup | Repeated basic attacks |
| Archer | Volley | A follow-up strike after a sequence of attacks |
| Mage | Transfer | Damage spread to another nearby enemy |
| Spearman | Pierce | An additional target in the attack path |
| Cavalry | Overdrive | A defeated enemy enabling a stronger next attack |
The linked unit pages carry the listed level-one effect and individual source. This table is a map from donor to purpose, not a ranking of overall unit strength. A donor can still be worth keeping as a separate fighter.
Capacity changes the decision
The current community reference lists one slot for Normal, two for Advanced, three for Rare, four for Legendary, five for Prism and three for Special. It also describes duplicate imprints increasing an existing effect, up to level five. With no empty slot, the incoming effect creates a replacement or conversion decision.
That capacity is why the receiver matters. A one-slot starter cannot hold an unlimited collection of useful effects. You have to choose what its limited space should accomplish. A higher-grade unit may allow a combination, but that does not make every available combination appropriate.
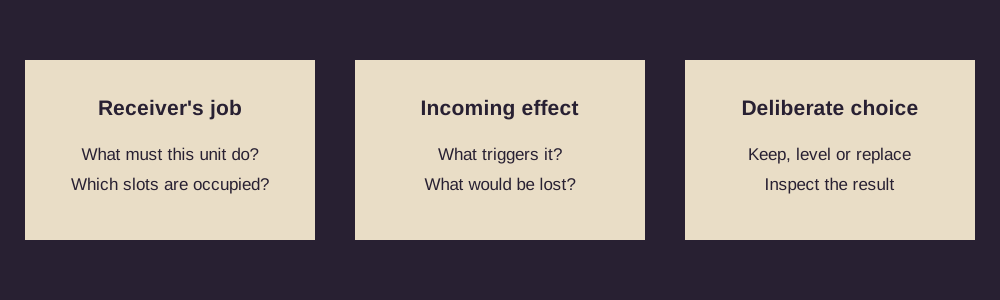
Before confirming a choice, read the existing effect again. If you selected the receiver because of its current behaviour, replacing that behaviour should be a deliberate plan. Do not assume a prompt is harmless just because the merge also raises another number.
Match the trigger to the receiver
An attack-triggered effect needs opportunities to attack. If the receiver is being defeated immediately, adding another offensive trigger may not address the cause. First check what prevents the unit from contributing. It might need a different army structure rather than a new damage effect.
An effect that spreads or pierces damage needs an appropriate extra target for that component to matter. Against a lone surviving enemy, the extra-target part has a different opportunity than it does against a dense group. That does not make it bad; it changes the fight in which you expect it to help.
A defeat-triggered effect needs the relevant defeat to occur. Consider whether the receiver is likely to secure that trigger in the encounter you are preparing for. Do not count a conditional bonus as if it were a permanent increase on every attack.
This trigger-first method lets you reason about unfamiliar effects without memorizing an enormous ranking. Read the condition, identify the benefit, then ask whether the current army creates that condition often enough. If the effect depends on an interaction you do not understand, postpone the irreversible merge until you can read the Collection.
Compare replacement with development
There are two different improvements you might want: making an existing job stronger, or giving the receiver a different job. Raising an effect you already rely on serves the first purpose. Replacing it may serve the second. Neither is automatically correct.
Suppose your receiver is contributing consistent basic attacks and the rest of the army keeps it alive. An effect that rewards those attacks has a clear role. If the army instead struggles because several enemies remain active at once, you might evaluate an effect with additional-target value. The right question is whether that change fixes the observed failure without removing something essential.
Now suppose the receiver itself is the last survivor but cannot finish the boss. That is a different problem again. An effect designed around hitting extra enemies may not address the final one-on-one situation. You would inspect the boss fight and the receiver’s existing tools before deciding what to replace.
These examples describe how to compare choices, not a tested recommendation to put one named imprint on every unit. Exact damage interactions can depend on class skills, traits, equipment and patch changes that are not captured by a short table.
Do not spend the whole army for one effect
A tempting imprint can distract you from the cost of its donor. If the donor is your only effective ranged attacker or the only unit filling a needed role, the army may lose more than the receiver gains. Absorption is both an upgrade and a removal.
Count the survivors before confirming. Ask what each will do after the merge. If your explanation contains an empty role that you hope the next spin will fill, recognize that as a risk rather than a completed plan. You can choose to take that risk, but the future summon is not guaranteed.
Protect valuable units with locks while working through several donors. The absorption walkthrough explains the direction of the drag and the checks after each merge. Single-donor actions are useful when you are learning because you can see exactly which choice changed the receiver.
How to read an imprint build in a video
Pause when the creator opens the relevant unit information. Record the class, grade, imprint names and levels you can actually see. If a detail is hidden, leave it unknown. A title saying that a unit is “immortal” does not tell you which supporting effects made the observed run possible.
Then check the recording date. A demo video can demonstrate a useful idea while using values that no longer match the full release. Deadeye, for example, received an attack reduction in v1.0.0 (7). A build’s old damage output should not be silently treated as a current result.
Use the footage to form a question: which condition is keeping the carry active, and can my current board provide it? That is more transferable than copying only the final class name. Our Hard-mode build analysis uses a named run with chapter references so you can inspect the development before the final fight.
A pre-battle imprint check
After several merges, reopen the unit you intend to carry the fight. Check the actual displayed effects rather than relying on memory. Confirm that an accidental replacement has not removed the effect you meant to retain and that the donor you intended to keep still exists.
Next, match the effects to the approaching task. Are you preparing for a group, a durable boss, or a fight in which survival has been the problem? If the answer changes, reassess the priority. Do not make a last-second replacement simply because a new option appeared.
Finally, leave the board in a state you understand. If you cannot explain the receiver’s job after the changes, use the preparation time to inspect it. A deliberate, understandable army is easier to improve after a loss than a collection of effects chosen because each sounded strong in isolation.
Questions and evidence limits
Can one Normal unit keep all five starter imprints? The reference lists one slot for Normal units. Use the receiver’s actual slot display and replacement prompt; do not plan around unlimited capacity.
Is the donor always expendable? No. Its imprint is only one part of its value. Removing the donor also removes its independent contribution to the army.
Does this page prove a best endgame combination? No. It provides documented donor relationships and a way to evaluate them. We have not independently benchmarked full-release endgame combinations.
Sources
Slot capacities and duplicate handling are attributed to Wikily’s imprint reference, checked 17 November 2026. Starter effect details are sourced individually on the five linked unit pages. Developer changes affecting comparisons are recorded on the updates page. The decision examples and checklist are our editorial analysis.
Look up a unit · Plan a build · Check the latest covered patch
Evidence-based editorial guidance. We have not independently play-tested these builds. How we check and update this guide.