
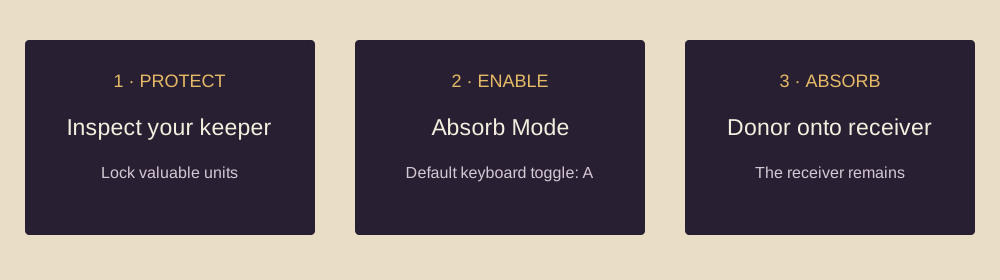
To absorb units in Slotbound, enable Absorb Mode between battles, then drag the unit you are willing to consume onto the unit you want to keep. The receiving unit survives and develops; the donor disappears. The default keyboard toggle is A. Lock valuable units before you start merging.
The direction matters. Choose the receiver before touching the donor. A strong unit dragged onto an expendable one is not the same decision as the reverse. This guide explains a careful single-unit workflow before discussing bulk absorption.
Make the receiver obvious
Open the unit information and read the full name. Similar symbols can represent different grades and promoted classes. Do not decide from colour or portrait alone. Check the receiver’s current role, Absorb LV, imprints and what you expect its next promotion to accomplish.
Lock the units you want to preserve. The official v0.3.0 announcement describes the lock as protection against being used as absorption material. That makes it a useful safeguard for a support unit as well as your main damage dealer. A unit can be worth keeping because it fills a missing role, even when its visible attack is lower than another unit’s.
Next, choose a donor whose removal you can explain. Perhaps it is an extra copy, an unneeded role, or the source of an imprint you want. “Lowest rarity” is an incomplete reason. If it is the only unit protecting a fragile attacker, removing it still changes the army’s behaviour.
A controlled single-absorb sequence
- Wait until preparation, outside active combat.
- Identify the receiver by name and inspect its current imprints.
- Lock other valuable units.
- Turn on Absorb Mode with the interface button or the default A key.
- Drag the donor onto the receiver.
- Read any imprint decision before confirming it.
- Resolve a promotion if one becomes available.
- Reopen the receiver’s information and check the result.
For the first unfamiliar combination, stop after one donor. This gives you a clean before-and-after comparison. If you absorb several units at once, it becomes harder to work out which action replaced an imprint or crossed a promotion threshold.
What changes after absorption
Absorption links several progression systems. A receiver gains Absorb LV, can gain or improve an imprint, and can reach the point at which a new class becomes available. These are related changes, but they should not be treated as interchangeable labels.
An imprint is an effect carried by the unit. A promotion changes its class along a branch. Grade determines other limits and starting characteristics. You should therefore ask three questions after a merge: did the level change as expected, did the intended effect remain, and did a class choice appear?
The community reference records Normal promotion thresholds at Absorb LV 5 and 12, and Rare thresholds at 8 and 18. These are reference values, not a claim that every donor provides exactly one level. Different donor properties and imprint decisions can affect the gain. Read the resulting level in the game instead of counting bodies as a substitute for the displayed value.
For the class branch of a starter unit, open its unit page. Our imprint guide handles effect choice and capacity separately, so you do not have to learn every effect before performing your first safe merge.
A worked decision without invented damage math
Imagine that your board has two Warriors and a Mage. You want to develop one Warrior, and the other appears expendable. First check whether both Warriors are currently needed to keep the Mage in the fight. If the army is already comfortable, consolidating a duplicate may be reasonable. If the Mage is dying early, removing a body might expose the problem sooner.
Now inspect the receiving Warrior. Does it already carry the effect you want to level? Is the incoming imprint useful for the job you are giving it? If the panel asks you to replace something, compare that effect with the donor’s effect before proceeding. The visible level gain is only part of the transaction.
After the merge, do not assume that a promotion has made the army stronger in every situation. Read the class choice. An option can change the unit’s purpose, and a useful support branch may be a better fit than another attacker. The goal is to improve the army’s weak point, not merely to reach the next star quickly.
This is an illustrative decision tree. It does not claim a particular win chance, enemy target order or guaranteed promotion from one donor. Those would require an actual matching game state and measurements.
When a drag does nothing
Start with controls. Are you in Absorb Mode, or are you moving or selecting a unit? The A key toggles the mode; pressing it twice returns you to the previous state. Check the visible mode indication instead of repeatedly tapping it.
Check the timing next. The documented action happens between battles. Wait for combat to finish and return to preparation. Check whether the intended donor is locked. Protection is doing its job if a locked unit refuses to become material; unlock only the unit you genuinely intend to spend.
Finally, read any open panel. A pending imprint or class decision can make further actions confusing because you have not finished the previous one. Resolve that choice deliberately, then inspect the board again. A successful drag should have a visible result: the donor is gone and the receiver’s information reflects the change.
If the machine itself refuses to spin after a new summon, investigate army capacity. That is a different problem from a broken drag control. The slot-machine troubleshooting page explains the order of checks and the original player report behind this distinction.
Be careful with Absorb All
Wikily documents a bulk absorption control that can consume multiple unlocked units in sequence. It is a convenience feature with a much larger decision attached to it. Do not use it as a substitute for understanding one manual absorption.
Before holding a bulk control, inspect every unit you intend to preserve and make sure its lock is active. Include supports and units you are keeping for a future branch. Then consider whether losing the remaining bodies changes your army’s ability to fight the next wave. A larger receiver is not automatically a complete team.
If you are learning a new imprint interaction, use one donor at a time. The extra clicks give you information. Bulk actions are more appropriate when you already know which units are expendable and which outcomes the current build allows. We have not independently tested every edge case of bulk ordering, so this guide does not promise a particular consumption sequence.
Preserve the effect that makes the build work
A common planning mistake is to focus on level gain and ignore what is removed. Suppose you selected a receiver because one of its effects helps it survive. Replacing that effect with another damage option may increase offence while removing the condition that allowed it to attack at all.
Use a simple comparison: what does the old effect do, what does the incoming one do, and which problem did the last battle expose? If you cannot answer the first two questions, inspect the Collection before choosing. The v1.0.0 (8) update made it accessible during a run and during promotion selection, which is useful when a decision introduces an unfamiliar name.
This also helps with video builds. Pause at the creator’s actual receiver and inspect the effects visible there. Two units with the same class name can have very different development behind them. Copying the class while missing its supporting effects is not reproducing the same build.
Finish with a board check
Before starting the next fight, count what remains and identify each survivor’s job. Confirm that your desired support still exists, the receiver has the intended imprint, and there is no unresolved promotion. If you were merging because of a capacity warning, verify the warning has cleared rather than assuming that one action was enough.
If the next battle goes worse, review the structural change first. Did you lose a front-line body? Did a useful effect get replaced? Did the class branch change what the unit contributes? These explanations are more useful than declaring absorption itself a mistake.
Sources
Controls and locking are documented by the developer in v0.3.0. The donor/receiver operation, threshold references and bulk-control description are cross-checked against Wikily’s absorption reference. The examples are editorial guidance; the page does not claim hands-on validation of a specific army.
Look up a unit · Plan a build · Check the latest covered patch
Evidence-based editorial guidance. We have not independently play-tested these builds. How we check and update this guide.